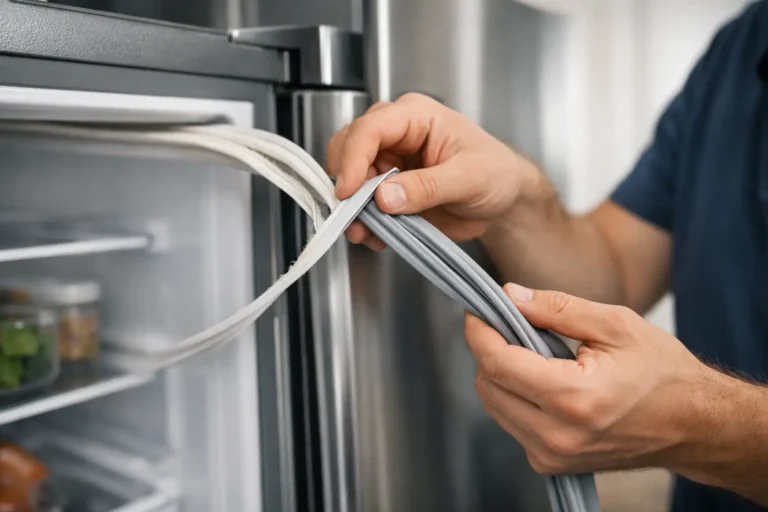
A worn oven door seal can turn a straightforward roast into an uneven, slow-cooking frustration. Heat escapes around the door, the oven has to work harder to hold temperature, and controls may remain on for longer than they should. Before you replace an oven door seal, make sure the gasket is genuinely the cause. A loose hinge, distorted door or temperature-control fault can produce very similar symptoms.
For many electric ovens, changing the seal is a manageable job when you have the correct manufacturer-specific part and the door closes squarely. But fitting the wrong gasket, forcing clips into place or overlooking a damaged hinge can leave you with the same problem and an unnecessary expense.
When to replace an oven door seal
The door seal, also called an oven gasket, creates a heat-resistant barrier between the oven cavity and the door. It will naturally deteriorate through years of heat, steam, grease and cleaning. It does not need to look perfect to work, but certain signs mean replacement is sensible.
Look for splits, hardened sections, flattened areas, frayed material or clips that no longer hold the gasket firmly in its channel. A seal that has pulled away at a corner is particularly likely to leak heat. You may also notice excessive heat around the door, longer cooking times, uneven browning or smoke escaping from the edges during normal use.
A simple paper test can help. With the oven completely cold, close the door on a strip of paper in several places around the frame. There should be steady resistance when you pull it out. If it slides freely in one area, the seal may be compressed or the door may not be sitting correctly.
This is a useful indication, not a full diagnosis. Modern ovens vent a small amount of heat and moisture by design, so some warmth around the front panel is normal. The concern is a clear, localised gap, visible damage or a noticeable change in cooking performance.
Check the seal is the real fault
Replacing a seal will not correct a door that is dropping on one side. Open the door slowly and check whether it feels loose, catches, sits unevenly or has a larger gap at one corner. Worn hinges, damaged hinge receivers and bent door components can prevent a new gasket from sealing properly.
It is also worth considering the symptoms. If the oven reaches temperature but food cooks unevenly, the issue could be the fan motor, fan element or a faulty thermostat. If it takes far too long to heat up, an element may be failing. A seal is often visible evidence of wear, but it should not become the automatic explanation for every cooking problem.
Use the appliance model number to identify the right part. This is usually found around the door opening, behind the storage drawer, on the side panel or in the instruction manual. Oven seals differ in profile, size, corner shape and fixing method, even between models from the same manufacturer. A universal seal may appear similar but can be too thick, too loose or unsuitable for the heat level of your appliance.
How to replace an oven door seal safely
Allow the oven to cool fully before starting. Switch it off at the cooker isolation switch or unplug it if the plug is safely accessible. This work is carried out around the oven cavity rather than live components, but isolating the appliance removes avoidable risk. If you have a gas oven and need to move the appliance, do not disturb the gas connection.
Take a clear photo of the existing seal before removal. The picture gives you a useful reference for the route around the frame and the position of joins, hooks or retaining clips.
Remove the old gasket carefully
Most oven door seals either push into holes around the cavity frame using small hooks, fit behind retaining clips, or sit in a dedicated channel. Begin at one corner and gently release each fixing point. Do not pull hard on the seal, as old hooks can snap and fragments may remain lodged in the fixing holes.
Once removed, clean the mounting area with a soft cloth and warm water with mild washing-up liquid. Grease and burnt-on residue can stop the new gasket sitting flat. Avoid aggressive oven cleaner, sharp tools and abrasive pads around the enamel edge, especially if the appliance has a catalytic lining.
Fit the correct new seal
Check the new gasket against the old one before fitting. The corners, hooks and overall shape should match. Start at the top or at the manufacturer-designated point, then work evenly around the frame. Press each hook or clip home with your fingers until it is secure.
Do not stretch the seal to make it fit. A gasket that seems too short, too long or difficult to align is usually the wrong part or has been installed in the wrong orientation. Similarly, do not trim a pre-formed seal unless the manufacturer specifically states that it is a cut-to-length design.
Make sure the gasket lies flat and does not twist at the corners. Close the door gently. It should meet the oven frame evenly without needing force. A newly fitted seal can feel firmer than the old one, which is expected, but the door should still latch normally.
Test before relying on the oven
Restore power and run the oven at a moderate temperature for around 10 to 15 minutes, following any bedding-in guidance supplied with the part. There may be a slight new-material smell at first. Ventilate the kitchen and let the oven cool before checking the seal again.
Look for sections that have lifted or shifted. Repeat the paper test around the perimeter once the appliance is cold. If the door remains uneven, a corner will not stay in place or heat is still escaping heavily, stop using the oven at high temperatures until the underlying fault is assessed.
When a professional repair is the better choice
A replacement gasket is a relatively low-cost repair, but it depends on the condition of the rest of the door assembly. Professional diagnosis is worthwhile when hinges are stiff or loose, the inner glass is damaged, the door has dropped, fixings have broken off, or the oven is overheating and burning food.
It is also the sensible route for integrated ovens that are difficult to access, appliances with complex door mechanisms, and any situation where the fault may involve electrics. Replacing parts by trial and error can cost more than identifying the cause first, particularly on premium Bosch, Neff, Siemens or Miele ovens where the correct fit matters.
For households in West London dealing with an oven that will not hold heat or close correctly, CrownTech Appliances can diagnose the door, hinges and heating system in the same visit. Certified engineers provide fixed-price quotes before work begins, and repairs are covered by a 12-month written parts and labour warranty.
Avoid shortening the life of the new seal
Once fitted, keep the gasket clean but treat it gently. Wipe spills off after the oven has cooled rather than allowing grease to bake onto the rubberised material. Do not scrape it with a blade or soak it in harsh chemicals, and avoid slamming the door, which can compress the seal and stress the hinges over time.
If the oven door begins to catch or needs lifting to close, arrange attention early. A sound seal cannot compensate for worn hinges, and continuing to force the door closed can damage both parts.
A properly fitted oven door seal should help the appliance retain heat, cook more predictably and avoid wasting energy. If the door still does not close evenly after fitting the correct gasket, treat that as a useful clue: the oven is telling you the problem lies deeper than the seal.